MAYA動畫教程:如何在建模時控制關節(jié)變形B
Basically the front verts go forward, the lower front ones go up and the upper go down, the back verts go back a bit... you'll see, it's easy. I did these adjustment in less than 5 minutes.
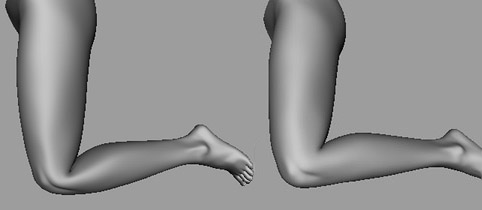
Now the morf target looks like this:
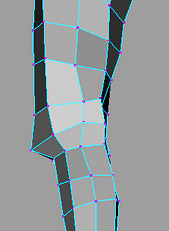
You'll want to add more than one target to each knee. Now do the next target, maybe at around 130 degrees.
This one is trickier to get right - now the verts on the Wrapper geometry's thigh and calf are penetrating each other. And since Wrap deforming isn't based on a "one-on-one relationship between 2 verts" but more of a "whichever is closest will have the most effect", it gets harder to control their behavior as they clump together.
Next use Set Driven Key to hook these Blendshape sliders up to the Y-rotation of that knee. As the first slider reaches 1, the other stays at 0. As the second reaches 1 the first stays at 1, and if you have other targets, so on.
The hip usually needs 2 targets forward, and the spine maybe about 10 (left/right, back/front, lower/upper spine). The neck needs a few, and the shoulder needs about 4. All in all you should be able to make do with about 20 - 30, which is still very light and doesn't take that long to do.
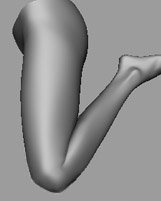
If you want the knee to be even better than this you can either raise the resolution of the Wrapper - though there's a limit to how useful that can be, due to the 'fuzziness' of the influence area I mentioned earlier. You can also add Blendshapes straight to the high-res Skin, though I'd save that as a last resort - one such target makes the file much heavier than Wrapper targets. (Most of the other joints won't need this though.) Here's what the 90 and 130 degree rotations can look like with such fine-tuning:

Added benefits of this system: you can quickly, easily, and with little extra file-size, create targets to handle big sweeping changes to the geometry, which are typically very hard to do on very high-res geometry. You can then easily animate these changes. For instance, the character can very easily be made fatter or skinnier, or pregnant, or suddenly get Popeye arms etc. And you can do these things much later, it's very flexible and modular that way.
Also, if you hide the Skin the file is very fast and interactive and easy to animate - a built in low-res proxy.

Here's a screencap showing 3 different bodies, 2 descendants created from the original. Since they all have exactly the same topology on the 0 level, they can all be animated using the same Wrap deformer, which means there is no rigging time at all needed to switch between these 3, simply un-Wrap and re-Wrap.
The middle one is cut in 2 pieces, the seam is covered by a belt. The neck seams are covered by necklaces or collars.
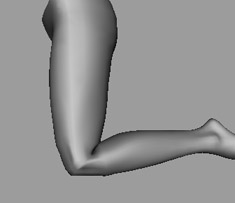
Since Subd's are tricky to work with, why not use poly meshes instead?
Here's the same Skin, after doing Adaptive convert to poly, using the same Wrapper, (no morftargets yet).
I had to set the threshold on the Wrapper up higher to catch all the verts, which lessens the control you have.
It's quite jagged, and applying a morftarget to this will be messier, take longer, and up to 30 of them will be quite a heavy file in the end. And if I ever wanted to make major changes to the body, I would most likely have to redo all those 30 targets. The results would be even worse in areas like the butt and shoulders.
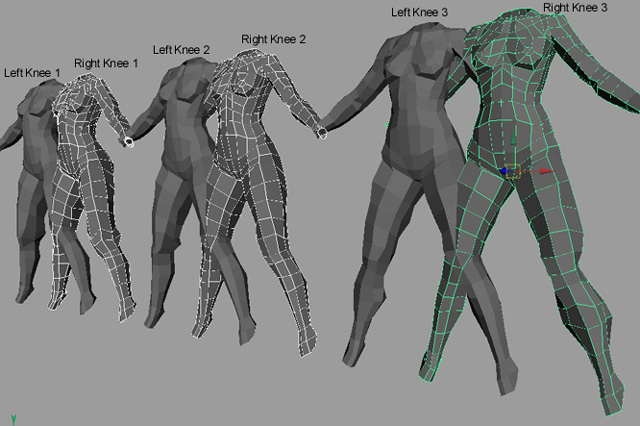
This shows how I lay out my Blendshapes - I overlap the ones that go together as a left-right pair, and place all for the same joint in the same row. In this example I'm using 3 consecutive targets for the knees.

Here are the hip targets.
The rest of the targets for this particular model (so far) is:
Breathing
Stomach Breathing
Spine Forward (lumbar region) the other spinal directions look ok with default Smooth-bind
ShoulderDown, left/right
ShoulderUp 1, left/right
ShoulderUp 2, left/right
ShoulderForward, left/right
ShoulderBack, left/right
InnerShoulderForward left/right (extra joint above Shoulder)
Elbows 1, left/right
Elbows 2, left/right
Wrist-roll, left/right
Arm-roll, left and right (actually shoulder-roll, but using extra joint in upper arm)
33 in all. (To control the neck I use a couple clusters.)

